Introduction to Email Templates
Cloud WMS supports customizable email templates directly within the application. This functionality is User-based, meaning each user manages their own set of templates tailored to their specific workflow.
[!NOTE] If a user is unable to see these options, verify their software version and contact Datapel Support for an upgrade if necessary.
Creating and Saving Templates
Navigate to Document: Open the required document (e.g., Invoice or Packing Slip) from the Sale or Despatch menus.
Access Email Menu: Click the Attachments tab or Manifest tab, right-click the document, and select E-mail.

New Email Message screen will Open

Customize Content: In the New Email Message screen, customize the body by adding text, logos, or images.
Save Template: Click Add Template, enter a unique name for your template, and click OK.

The next time you email an attachment, your saved template will be available in the drop-down list.

Managing Templates (Delete/Remove)
To clean up or remove old templates:
Within the Email interface, go to Email Templates.
Click the Combo box (drop-down) and select the template you wish to remove.
Press Delete Template located in the lower left corner.
Select OK to confirm.

Configuring Sender Profiles (BCC & From)
To ensure emails are sent from the correct address and saved with your profile:
Navigate to Options > Preferences.
Select the General Tab.
Click the link on the right side "Manage My Email Templates and Signatures.."
On the right side of the CC field, click Show BCC and then Show From to enter the email addresses you want to include.
To save your changes as a new template, select “ Add Template." Enter a new template name or just click OK to update the existing template.
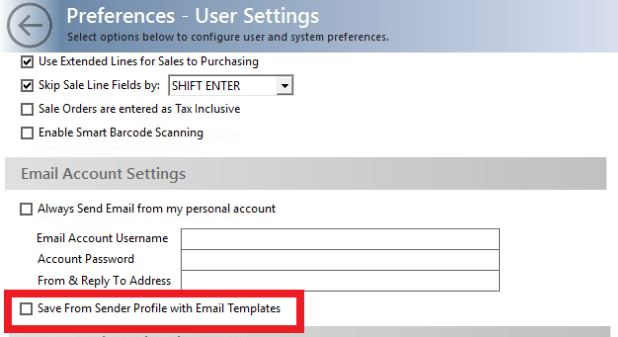
Enter the From and Reply-to email addresses.
Important: Tick the box "Save from Sender Profile with Email Templates".
Workflow Restriction
|
Related Information
Updating the default email / SMTP credentials
Cloud WMS Email Setup for Office 365
Was this article helpful?
That’s Great!
Thank you for your feedback
Sorry! We couldn't be helpful
Thank you for your feedback
Feedback sent
We appreciate your effort and will try to fix the article